As a seasoned professional in the home improvement industry, I’ve had the opportunity to assist numerous homeowners in Melbourne, FL, with their gutter installation projects. With a focus on providing informative and practical advice, I’m passionate about empowering homeowners to tackle DIY projects confidently. Through my experience and expertise, I aim to share valuable DIY gutter installation tips and insights to help homeowners achieve professional results on their own.
Gutter installation is a crucial aspect of maintaining your home’s integrity and protecting it from water damage. While hiring professionals for the job is always an option, many homeowners in Melbourne, FL, prefer the cost-saving and empowering route of DIY gutter installation. In this comprehensive guide, I’ll walk you through the steps for gutter installation, materials needed, safety precautions, and common mistakes to avoid to ensure a successful project. Get Additional Information
Steps for Gutter Installation
Step 1: Planning and Preparation
Before diving into gutter installation, it’s essential to plan the layout of your gutter system and gather all necessary materials and tools. Measure the dimensions of your roofline and determine the optimal placement of downspouts to ensure proper drainage away from your home’s foundation.
Step 2: Marking and Sizing
Using chalk or a pencil, mark the locations for gutter hangers along the fascia board, ensuring they are spaced evenly and sloped appropriately for water flow. Measure and cut the gutters to size using a hacksaw, making sure to account for any corners or angles in your roofline.
Step 3: Installing Gutter Hangers
Attach gutter hangers to the fascia board at the marked locations using screws or nails, ensuring they are securely fastened and level. For seamless gutter installation, consider using hidden hangers for a cleaner look.
Step 4: Attaching Gutter Sections
With the gutter hangers in place, carefully position the gutter sections along the roofline, ensuring they align correctly and maintain the desired slope. Secure the gutter sections to the hangers using screws or rivets, making sure to leave a slight gap between sections for expansion and contraction.
Step 5: Installing Downspouts
Attach downspout outlets to the gutter sections at designated locations, ensuring they are positioned to direct water away from your home’s foundation. Connect downspouts using elbows and fasteners, securing them to the gutter system with screws or brackets.
Step 6: Testing and Adjusting
Once the gutters and downspouts are installed, test the system by running water through it with a hose. Check for proper drainage and make any necessary adjustments to ensure optimal performance.
Materials Needed for DIY Gutter Installation
- Gutters: Choose from options such as aluminum, vinyl, or steel gutters, depending on your budget and preferences.
- Gutter Hangers: Available in various styles, including spike-and-ferrule and hidden hangers, to support the gutter sections.
- Downspouts: Select downspouts in appropriate sizes and materials to direct water away from your home’s foundation.
- Screws or Nails: Used to secure gutter hangers and attach gutter sections to the fascia board.
- Hacksaw: Essential for cutting gutter sections to size and making precise adjustments.
- Elbows and Outlets: Required for connecting gutter sections and directing water flow at corners and downspout locations.
- Sealant: Use silicone sealant or gutter caulk to seal joints and prevent leaks in the gutter system.
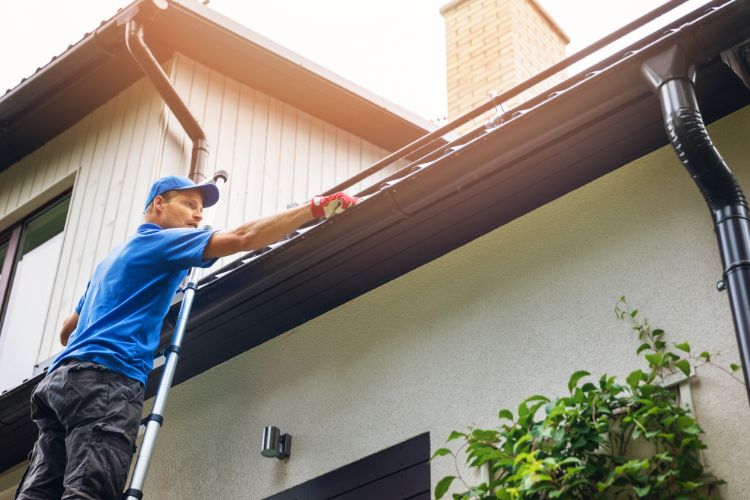
Safety Precautions for Gutter Installation
- Use a Ladder Safely: Ensure the ladder is stable and securely positioned on level ground before climbing.
- Wear Protective Gear: Use gloves to protect your hands from sharp edges and debris, and wear safety glasses to prevent eye injuries.
- Work with a Buddy: Whenever possible, enlist the help of a friend or family member to assist with lifting and positioning gutter sections.
- Avoid Working in Inclement Weather: Wait for clear, dry conditions to perform gutter installation to minimize the risk of accidents.
- Follow Manufacturer’s Instructions: Refer to the manufacturer’s guidelines for proper installation techniques and safety precautions.
Common Mistakes to Avoid in DIY Gutter Installation
- Incorrect Slope: Ensure the gutter sections have the correct slope for water flow, typically about 1/4 inch of slope per 10 feet of gutter.
- Improper Spacing: Avoid spacing gutter hangers too far apart, as this can cause sagging and inadequate support for the gutter sections.
- Forgetting to Seal Joints: Use sealant or gutter caulk to seal joints between gutter sections and downspouts to prevent leaks.
- Ignoring Permit Requirements: Check local building codes and obtain any necessary permits before starting your gutter installation project to avoid fines or penalties.
Conclusion
In conclusion, DIY gutter installation is a feasible and rewarding project for homeowners in Melbourne, FL, looking to protect their homes from water damage and preserve their structural integrity. By following the steps for gutter installation, using the right materials, practicing safety precautions, and avoiding common mistakes, you can achieve professional results and enjoy the satisfaction of a job well done.
Remember, with careful planning and attention to detail, DIY gutter installation can save you money and enhance the value of your home while providing peace of mind knowing your foundation is adequately protected. Find Out What’s Next